Step-by-Step Gel Nail Application
This comprehensive guide provides a step-by-step tutorial on applying gel polish, ensuring a long-lasting, chip-resistant manicure. Learn essential techniques for nail preparation, color application, and proper curing for a flawless finish. Discover aftercare tips for maintaining healthy, beautiful nails.
Nail Preparation⁚ Cleaning and Shaping
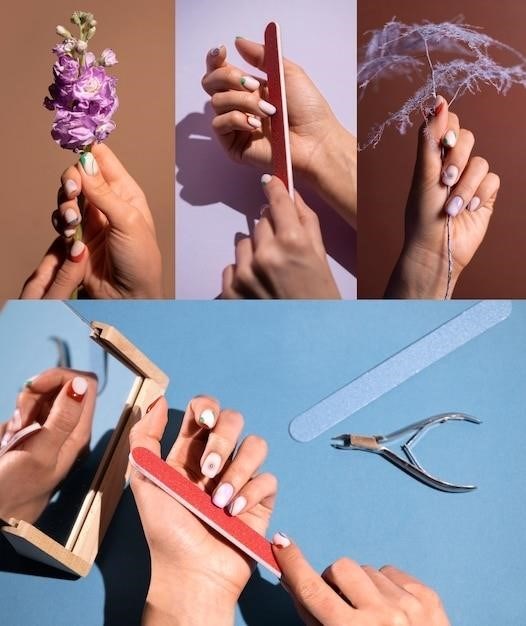
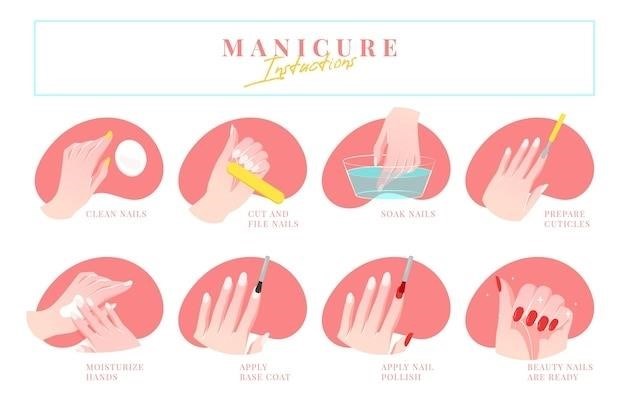
Begin with clean, dry nails. Remove any existing nail polish using acetone-based remover. Gently push back your cuticles using a cuticle pusher; avoid cutting them to prevent infection. Shape your nails using a nail file, aiming for a consistent length and desired shape. File in one direction to prevent splitting or weakening the nails. Once shaped, thoroughly clean the nail surface with rubbing alcohol to remove any oils or debris that might interfere with the adhesion of the gel polish. This ensures optimal bonding and prevents lifting. A well-prepared nail surface is crucial for a long-lasting gel manicure. Remember, proper preparation is key to a successful and durable gel manicure, maximizing the longevity of your polished look. Take your time and ensure each nail is meticulously prepped for perfect results. This step is essential for preventing chipping and ensuring a smooth, even finish for your gel polish application.
Cuticle Care and Buffing
After shaping, focus on cuticle care. Gently push back your cuticles using a cuticle pusher or orangewood stick. Avoid cutting your cuticles, as this can lead to infection. Then, lightly buff the nail surface with a fine-grit buffer. This creates a slightly rough texture that helps the gel polish adhere better, preventing chipping and peeling. Be gentle to avoid over-buffing, which can weaken the nails. After buffing, thoroughly wipe the nail surface with a lint-free wipe saturated with rubbing alcohol. This removes any dust or oils left behind by the buffing process, ensuring a clean, smooth surface for optimal gel polish adhesion. A clean and properly prepped nail plate is essential for a long-lasting, flawless gel manicure. This step is crucial for creating a strong bond between your natural nail and the gel polish, resulting in a longer-lasting manicure. Remember, even and gentle buffing is key to prevent nail damage and enhance the polish’s hold.
Applying the Base Coat
Once your nails are prepped, apply a thin, even layer of the gel base coat. This crucial step ensures the gel polish adheres properly and lasts longer. Start by applying a thin layer to the center of your nail, extending it to the edges. Pay close attention to sealing the edges, a process called “capping,” which involves painting over the very tip of the nail to create a protective barrier and prevent chipping. Avoid applying too much base coat, as this can lead to uneven curing and lifting. After applying the base coat to each nail, cure your nails under a UV or LED lamp for the recommended time (usually 30-60 seconds). The curing process hardens the base coat, creating a strong foundation for your chosen gel polish color. A properly cured base coat will improve the longevity of your manicure significantly, ensuring your beautiful gel nails remain chip-free for weeks. Remember, thin, even coats are key for a flawless, long-lasting result.
Applying the Gel Polish Color
With the base coat cured, it’s time for the fun part – applying your chosen gel polish color! Begin by shaking the bottle well to ensure even pigment distribution. Apply a thin, even coat of your gel polish, working from the center of the nail outward to the edges. Aim for a smooth, consistent application, avoiding any thick globs of polish which can lead to uneven curing and a less professional appearance. It’s better to apply multiple thin coats than one thick coat. Remember to cap the free edge of each nail just as you did with the base coat to create that protective seal against chipping. After applying the first coat to all nails, cure them under your UV/LED lamp for the recommended time. For deeper color saturation, apply a second (or even third) thin coat, curing each layer individually. If you make any mistakes, use a small brush dipped in acetone to gently clean up any excess polish on your skin before curing. Take your time and focus on precise application for a truly polished and professional-looking finish.

Curing the Gel Polish
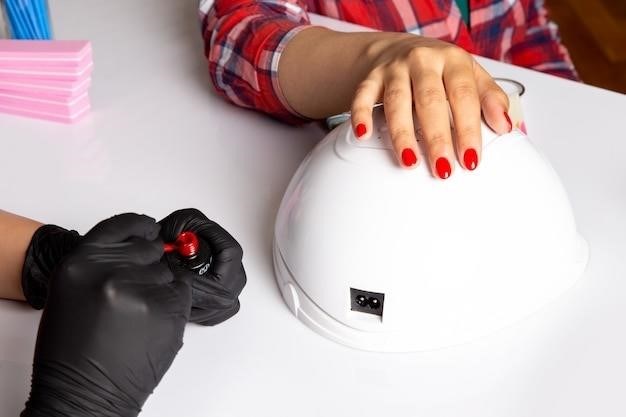
Curing is a crucial step in the gel nail process, responsible for hardening the polish and ensuring its long-lasting durability. After each coat of gel polish, you’ll need to cure your nails under a UV or LED lamp. The specific curing time varies depending on the type of lamp and the brand of gel polish you’re using; always check the instructions on your products. Typically, a UV lamp requires around 2 minutes per coat, while an LED lamp might only need 30-60 seconds. Ensure your nails are positioned correctly within the lamp to ensure even curing, and don’t move them during the process. Proper curing prevents smudging and chipping, contributing to a manicure that lasts for weeks. If your lamp lacks a timer, set a timer on your phone to ensure accurate curing times. After curing, your nails may feel slightly tacky; this is normal for some gel polishes. However, it’s important to be careful not to touch your nails while they’re still curing to avoid smudging or damaging the freshly applied layers.
Applying the Top Coat

The top coat is the final protective layer in your gel manicure, sealing in the color and adding a glossy shine; Apply a thin, even coat of your gel top coat over the cured color, ensuring complete coverage of each nail. Pay close attention to the edges, “capping” the free edge of the nail to prevent chipping and peeling. This involves carefully painting over the very tip of the nail, sealing the color and protecting it from wear and tear. A high-quality gel top coat is essential for a long-lasting manicure; look for one specifically formulated for gel polish. Avoid applying too thick a coat, as this can lead to uneven curing and a less desirable finish. After applying the top coat, cure your nails under your UV/LED lamp for the recommended time, usually around 60 seconds for LED and 2 minutes for UV lamps; refer to your product instructions for precise timing. Once cured, gently wipe off any sticky residue using a lint-free wipe and 99% isopropyl alcohol. This will leave your nails with a smooth, flawless, and long-lasting gel manicure. Remember to always cap the free edges for best results.
Final Curing and Clean-up
After applying the top coat, the final step is curing your nails one last time under the UV or LED lamp. This crucial step hardens the top coat, sealing everything in place and ensuring a durable, chip-resistant finish. The curing time will depend on your lamp type and the specific products used; generally, LED lamps require around 60 seconds, while UV lamps may need up to 2 minutes. Always refer to the instructions of your lamp and gel products for the exact curing time. Once cured, you may notice a slight tackiness or sticky residue on your nails. This is common with gel polish and can easily be removed. Using a lint-free wipe or cotton ball, gently wipe the surface of each nail with 99% isopropyl alcohol. This will remove any residue, leaving your nails smooth and shiny. Avoid using harsh solvents or acetone at this stage, as they could damage the gel polish. With the sticky residue removed, your gel manicure is complete. Admire your perfectly cured, professionally-looking nails, ready to show off your stunning new manicure. Enjoy your long-lasting, beautiful gel nails!
Aftercare⁚ Cuticle Oil and Protection
Proper aftercare is crucial for maintaining the longevity and health of your gel manicure. The UV exposure during curing, and the chemicals in the gel itself, can dry out your nails and cuticles. To counteract this, consistent application of cuticle oil is vital. Apply cuticle oil daily, focusing on both your cuticles and the nail plate itself. This will provide much-needed hydration, preventing dryness, cracking, and brittleness. Look for oils that penetrate deeply, nourishing the skin and nails from within. Avoid oils that simply sit on the surface, offering minimal benefit. Choose a high-quality cuticle oil, preferably one enriched with vitamins and nourishing ingredients. Regular use will keep your nails supple and healthy, extending the life of your gel manicure. Additionally, protecting your nails from excessive water exposure and harsh chemicals is recommended. Wear gloves when washing dishes or cleaning, minimizing contact with detergents and other potentially damaging substances. This simple precaution significantly reduces the risk of your gel polish lifting or chipping prematurely. By following these aftercare tips, you can ensure that your beautiful gel manicure lasts longer and keeps your natural nails in optimal condition.
Gel Polish on Acrylics or Tips
Applying gel polish to acrylics or nail tips extends the lifespan and enhances the aesthetic appeal of your nail enhancements. Before starting, ensure your acrylics or tips are properly prepared. This involves cleaning the surface to remove any dust, oil, or residue that might hinder adhesion. A gentle buffing is often recommended to create a slightly rough surface for better bonding. Once prepared, apply a thin layer of your chosen base coat, carefully sealing the edges to prevent chipping. Cure this layer under a UV or LED lamp according to the manufacturer’s instructions. Apply your desired gel polish colors in thin coats, curing each layer individually. Two or more thin coats will provide richer color and better coverage than one thick coat, which may lead to uneven curing and lifting. Finish with a top coat, also cured under the lamp, to protect the color and add a glossy shine. Remember to cap the free edge of the nail, extending the top coat slightly beyond the tip. This reinforces the seal and prevents early breakage. With proper application and aftercare, your gel-polished acrylics or tips should last for several weeks, maintaining their vibrant color and flawless finish. The key is to use thin layers of product, curing each thoroughly to ensure complete adhesion and durability. This method offers a long-lasting, professional-looking result, even for at-home application.
Removing Gel Polish
Removing gel polish requires careful technique to avoid damaging your natural nails; Begin by gently buffing the top layer of the gel polish with a medium-grit file. This helps to break the seal and allows the acetone to penetrate more effectively. Avoid excessive filing, as this can thin and weaken your natural nails. Next, soak cotton pads generously with 100% acetone and place them on your nails. Secure the pads with aluminum foil to create a tight seal, ensuring the acetone stays in contact with the gel polish. Let this soak for approximately 10-15 minutes, or until the gel polish begins to soften and lift. Gently push the softened gel polish off your nails with an orangewood stick or cuticle pusher. If the gel doesn’t lift easily, allow it to soak for a few more minutes. Avoid pulling or scraping forcefully, as this can damage your nails. Once the gel is removed, wash your hands with a gentle cleanser to remove any remaining acetone residue. Finally, moisturize your nails and cuticles with a rich oil to replenish moisture and prevent dryness often caused by acetone. This careful approach minimizes damage to the nail plate, promoting healthy nail growth and preparation for your next manicure. Remember, patience and gentleness are key to a successful and damage-free gel polish removal.


