Brother P-touch Label Printer⁚ Getting Started
Unbox your Brother P-touch printer and carefully review the included quick start guide. Install the label cassette, ensuring the tape is properly seated. Connect to your computer (if needed) using a USB cable. Install the necessary software and drivers from the Brother website.
Installing the Label Cassette
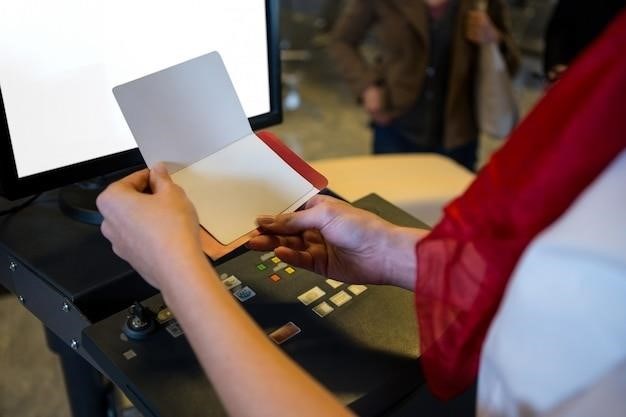
Open the cassette cover of your Brother P-touch label printer. Take a new label cassette and carefully remove any protective tape or coverings. Insert the cassette into the designated slot, ensuring it’s firmly seated. Pay close attention to the correct orientation, as indicated by markings on both the cassette and the printer. Close the cassette cover. If the cover doesn’t close easily, check the white lever—it should be in the up position. If not, lift the lever before closing the cover. Make sure there’s no slack in the tape; it should feed smoothly. A properly installed cassette will allow the printer to function correctly and prevent jams. If issues persist, consult your printer’s manual for troubleshooting steps or contact Brother support. Remember to always use Brother-branded label cassettes for optimal performance and print quality.
Connecting to a Computer (if applicable)
Connecting your Brother P-touch label printer to a computer allows for more advanced label creation and management using the P-touch Editor software. First, locate the USB port on your printer and the corresponding port on your computer. Use a standard USB cable (high-speed compatible with series A and B connectors, if needed; check your printer’s specifications). Plug one end of the cable into the printer’s USB port and the other into an available USB port on your computer. Once connected, your computer should recognize the new device. If not, you may need to install the necessary drivers. These drivers are usually included on a CD that came with the printer or can be downloaded from the Brother website. Follow the on-screen instructions during the installation process. After successful driver installation, you should be able to access the printer through the P-touch Editor software, allowing you to create and print labels directly from your computer.
Installing Software and Drivers
To fully utilize your Brother P-touch label printer’s capabilities, installing the necessary software and drivers is crucial. The installation process typically begins with locating the software CD included with your printer. Insert the CD into your computer’s optical drive; the installation program should launch automatically. If it doesn’t, navigate to the CD’s contents and find the setup executable file. Double-click to run the installer. Follow the on-screen instructions, selecting your preferred language and installation options. You might be prompted to connect the printer to your computer via USB during this process. Alternatively, if you don’t have the CD, visit the Brother website’s support section. Search for your specific P-touch model and download the latest drivers and software. After downloading, run the installation file and follow the on-screen instructions. Once the installation is complete, restart your computer to ensure all changes take effect. You should now be able to access the P-touch Editor software and begin creating custom labels.
Creating and Printing Labels
Select your desired label tape and settings within the P-touch Editor software. Design your label, utilizing templates or creating a custom design. Send the design to your printer and enjoy perfectly printed labels.
Choosing Label Tape and Settings
Before you begin creating labels, selecting the appropriate label tape and configuring the printer settings is crucial for optimal results. Brother offers a wide variety of label tapes in different widths, colors, and materials, each designed for specific applications. Consider factors such as the intended use of the label (indoor, outdoor, high-temperature environments), the desired aesthetic (color, finish), and the required durability. The P-touch Editor software provides a user-friendly interface to choose the correct tape type from a list of compatible options. Once the tape is selected, you can adjust various settings to fine-tune your label printing. These settings include font style and size, text alignment, label orientation, and margins. Experimenting with these settings allows you to create labels that are precisely tailored to your needs. For instance, you might choose a bold font for important labels or adjust margins to fit more text on smaller labels. Careful consideration of tape and settings ensures professional-looking, durable, and functional labels every time. Remember to consult your printer’s manual for detailed instructions on selecting compatible tapes and adjusting settings.
Using the P-touch Editor Software
The Brother P-touch Editor software is a powerful tool that significantly enhances the label creation process, offering features beyond the printer’s basic controls. It’s available for download from the Brother website and is compatible with both Windows and macOS operating systems. After installation, launch the software and connect your P-touch printer. The intuitive interface allows for creating labels from scratch or using pre-designed templates. You can easily input text, incorporate various fonts and font sizes, add barcodes, and insert images or logos. Advanced features include the ability to create multi-line labels, adjust text formatting (bold, italics, underline), and control label margins. The software also allows you to save your designs as templates for future use, streamlining the label creation process for frequently used labels. Before printing, you can preview your design to ensure accuracy. The software provides a visual representation of how the label will look, allowing for adjustments if needed. Once satisfied, simply send the design to your printer for printing.
Printing from the Label Collection
Many Brother P-touch label printers include a built-in collection of pre-designed labels, offering a quick and easy way to create common labels without needing software. Access this collection through your printer’s menu system; the exact steps may vary slightly depending on your model. Navigate to the “Label Collection” or similar option. Browse the available designs, categorized by purpose (e.g., address labels, file labels, identification tags). Each design often allows for customization, such as adding text or changing the font. Use the printer’s keypad or screen to select your desired label template and make any necessary modifications. Some printers might allow for previewing the label before printing, enabling last-minute adjustments. Once you’re satisfied with your customized design, initiate the printing process by pressing the designated print button. The printer will automatically cut the label to the appropriate size after printing, making it ready for immediate use. This convenient feature saves time and effort, ideal for frequently used label types.
Troubleshooting Common Issues
Encountering problems with your Brother P-touch label printer? This section provides solutions for common issues such as print failures, tape jams, and printer resets, helping you get back to efficient labeling.
Printer Not Printing⁚ Solutions
If your Brother P-touch label printer refuses to print, systematically check several key areas. First, ensure the printer is correctly powered on and that the power source is functioning. Examine the label cassette; is it properly installed and does it contain sufficient tape? Check the tape type; is it compatible with your printer model? Inspect the print head for any obstructions; a clogged print head is a common culprit. Clean it gently with a lint-free cloth. Next, verify the connection to your computer (if applicable) and check your print settings, making sure the correct printer and paper size are selected. Try printing a test label to confirm functionality. If problems persist, consult your printer’s manual or Brother’s support website for further troubleshooting steps or contact their customer service for assistance. Low battery power in handheld models can also prevent printing; replace the batteries to resolve this. Finally, consider whether a software issue or driver conflict is at play. Update or reinstall your printer drivers as needed.
Addressing Tape Jams and Other Problems
Tape jams are a common frustration with label printers. If a jam occurs, carefully power off the Brother P-touch printer before attempting any intervention. Open the cassette and gently remove any tangled or jammed tape. Avoid forcefully pulling the tape, as this can damage the printer mechanism. Inspect the tape path for any obstructions, such as debris or misaligned parts. If the problem persists after clearing the jam, try a new label cassette to rule out a faulty tape roll. Other issues may involve blurry or faded prints, which often point to a dirty print head. Clean the print head with a soft, lint-free cloth and a suitable cleaning solution (if recommended by Brother). If the labels aren’t adhering properly, check the print settings for appropriate margin adjustments or ensure the label surface is clean and dry. Incorrect label type selection can also cause printing problems. Always verify that the chosen tape is compatible with your Brother P-touch printer model. Refer to the user manual for detailed instructions and troubleshooting specific to your printer model.
Resetting the Printer
Resetting your Brother P-touch label printer can resolve various software or operational glitches. The method varies slightly depending on your specific model, so consult your user manual for precise instructions. A common approach involves turning off the printer completely. Then, while holding down a combination of buttons (often Shift and R), press the power button to turn the printer back on. Continue holding the designated buttons until the printer displays a confirmation message or restarts. This process typically clears temporary data and resets the printer’s internal settings to factory defaults. Note that this action may erase any custom label designs or settings you’ve saved in the printer’s memory. If the problem persists after a simple reset, there might be a more serious hardware or software issue requiring further troubleshooting or contacting Brother support. In some advanced cases, a full factory reset might be necessary, potentially requiring specific key combinations or software procedures outlined in your model’s user manual. Always back up important data before performing a factory reset.

Advanced Features and Tips
Explore advanced design options within the P-touch Editor software, creating custom label templates and managing them efficiently. Utilize various fonts, symbols, and barcodes for professional labels.
Customizing Label Designs
The Brother P-touch Editor software offers extensive customization options for your label designs. Beyond basic text entry, you can incorporate a wide array of design elements to create truly unique and professional-looking labels. Experiment with different fonts, sizes, and styles to achieve the desired visual impact. Add images, logos, or frames from the software’s library or import your own graphics for a personalized touch. Precise control over text formatting, including bolding, italics, underlining, and alignment, allows you to create labels that are both aesthetically pleasing and easy to read. Explore the various border and frame options to enhance the overall appearance of your labels. Don’t forget to experiment with different label tape colors and finishes to further personalize your labels and match your specific needs. For added creativity, incorporate barcodes or QR codes for easy identification and data tracking. The software’s intuitive interface makes it easy to experiment and refine your designs until you achieve the perfect label for your project. With a little creativity and exploration of the software’s features, you can produce highly customized labels that perfectly reflect your style and needs. Remember to save your frequently used designs as templates for easy access in the future.
Managing Label Templates
Efficiently manage your frequently used label designs by saving them as templates within the Brother P-touch Editor software. This feature significantly streamlines the label creation process, eliminating the need to recreate designs from scratch each time. The software allows you to organize templates into folders for easy retrieval. Assign descriptive names to your templates for quick identification. This organizational structure is particularly useful when dealing with numerous label designs for different purposes. Easily access and modify existing templates to adapt them to new requirements, saving time and effort. The ability to quickly recall and reuse templates is invaluable for maintaining consistency in labeling across various projects. Templates can be easily shared among multiple users, facilitating collaboration and ensuring uniformity in labeling practices. Remember to regularly review and update your templates to reflect any changes in your labeling needs. By effectively utilizing the template management features, you can significantly optimize your workflow and ensure consistent, high-quality labeling across all your projects. This improves efficiency and minimizes the time spent on repetitive tasks.
