North Vape Instructions: A Comprehensive Guide
Today’s date is 03/04/2026 19:54:38. This guide provides essential information for optimal use, covering charging, filling, and maintenance of your North Vape device.
Understanding Your North Vape Device
Navigating the world of vaping can seem complex, but understanding your North Vape is the first step to a satisfying experience. This device is designed for simplicity and ease of use, offering a convenient alternative to traditional smoking. Before diving in, it’s crucial to recognize that proper usage and care are paramount for both device longevity and user safety.
The North Vape operates using a pod system, meaning it utilizes pre-filled or refillable pods containing e-liquid. These pods house the coil, which is the heating element responsible for vaporizing the e-liquid. Understanding the interplay between the battery, pod, and coil is key.
Important considerations include battery life and charging protocols. It’s advisable to charge when low, avoiding use during charging. Furthermore, familiarity with the device’s features, as detailed in this guide, will enhance your overall vaping journey. Remember, resources like online forums dedicated to Canva (though not directly related, demonstrate a need for user support) highlight the importance of accessible information.
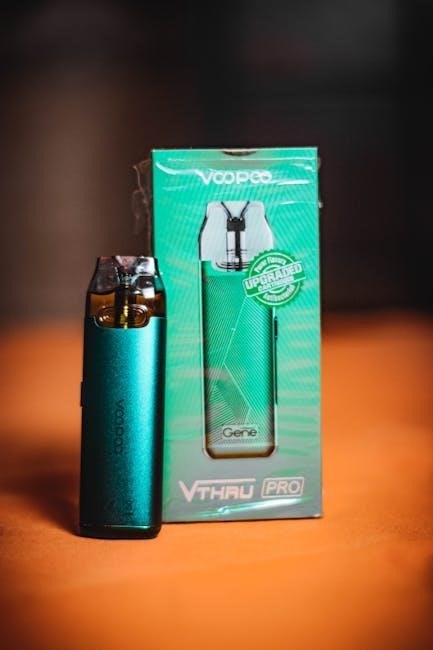
What’s Included in the Box
Upon unboxing your new North Vape, carefully verify all components are present. A complete package ensures a seamless start to your vaping experience. Typically, you should find the North Vape device itself, a USB charging cable – essential for powering up your device when the battery is depleted – and a user manual containing detailed instructions and safety guidelines.
Depending on the specific North Vape model, the box may also include one or more pre-filled pods, or a refillable pod requiring separate e-liquid purchase. Some kits may feature additional coils for future replacement, extending the lifespan of your device.
It’s vital to retain the packaging and documentation for warranty purposes. Similar to software like Canva, where understanding features requires referencing documentation, your North Vape’s manual is a valuable resource. Confirming all items are present immediately prevents potential issues and ensures you have everything needed to begin enjoying your North Vape.
Device Overview: Parts and Functions
The North Vape device comprises several key components working in harmony. The main body houses the battery and internal circuitry, powering the entire system. A crucial element is the pod, which securely holds the e-liquid and connects to the device via a magnetic or snap-fit mechanism.
A USB charging port, typically located on the base, facilitates battery replenishment. Many models feature a power button, used to activate the device and initiate vaping. Some North Vapes offer adjustable wattage or voltage settings, controlled via buttons or a simple interface.
Like design tools such as Canva, understanding each part’s function is essential for optimal use. The LED indicator displays battery life and device status. The coil, within the pod, vaporizes the e-liquid. Familiarizing yourself with these parts – and consulting the user manual – ensures safe and effective operation of your North Vape.

Getting Started with Your North Vape
Before your first vape, ensure the device is fully charged. Avoid using while charging, as advised. Prepare to fill the pod with your preferred e-liquid for optimal enjoyment.
Charging Your North Vape
Proper charging is crucial for maintaining the longevity and performance of your North Vape device. It’s advisable to charge your North Vape whenever the battery level is low, or when the device itself indicates a need for power. The device will likely have an indicator light to signal charging status – pay close attention to this.
Importantly, it is not recommended to use your North Vape while it is actively charging. This practice can potentially damage the battery and compromise the overall functionality of the device. Always use a compatible charging cable and power source to avoid any issues.
Allow sufficient time for a full charge, typically a few hours, depending on the device’s capacity. Once fully charged, disconnect the device to prevent overcharging, which can also negatively impact battery health. Regularly checking the battery level and charging proactively will ensure a consistent and enjoyable vaping experience.
Filling the Pod with E-Liquid
Before filling your North Vape pod, ensure you have selected a high-quality e-liquid compatible with your device. Carefully remove the pod from the device, typically by gently pulling it outwards. Locate the filling port on the pod – this is usually a small opening designed for e-liquid introduction.
Slowly and carefully introduce the e-liquid into the pod, avoiding overfilling. Overfilling can lead to leakage and potential damage to the device. Most pods have a maximum fill line; do not exceed this level. After filling, securely close the filling port to prevent spills.
Wipe away any spilled e-liquid from the pod and the device to maintain cleanliness. Once filled, reinsert the pod back into the North Vape, ensuring it clicks securely into place. Allow a short period for the e-liquid to saturate the coil – this process is known as priming, and is essential for optimal vapor production;
Priming the Coil
Priming the coil is a crucial step after filling your North Vape pod with e-liquid. This process ensures the wick is fully saturated, preventing a dry hit and extending the coil’s lifespan. A dry hit occurs when the coil heats up without sufficient e-liquid, resulting in a burnt taste and potential damage.
To prime the coil, after reinserting the filled pod, take a few small puffs on the device without pressing the fire button. This draws e-liquid into the coil. Alternatively, some users recommend waiting approximately 5-10 minutes after filling to allow the e-liquid to naturally wick into the coil.
Observe the e-liquid level in the pod; it should visibly decrease as the coil absorbs the liquid. If you don’t detect vapor after several attempts, or if the taste is still burnt, repeat the priming process. Proper priming guarantees a smooth and flavorful vaping experience with your North Vape device.

Using Your North Vape
Ensure the device is charged and the pod is correctly installed. Avoid using while charging for optimal performance and safety, following all guidelines carefully.
Powering On and Off
Understanding the power button is crucial for operating your North Vape. Typically, a quick five-click sequence activates or deactivates the device, ensuring it doesn’t accidentally fire while in your pocket or bag. This safety feature prevents unintended vapor production and conserves battery life.
To power on, locate the primary button – often a circular or rectangular shape – and press it rapidly five times in succession. You’ll likely see an indicator light illuminate, confirming the device is active. The light’s color may vary depending on the battery level.
To power off, repeat the same five-click process. The indicator light will extinguish, signaling that the North Vape is now in standby mode. Always power off the device when not in use, especially during storage or transportation. This simple step enhances safety and prolongs the lifespan of your vaping device. Remember to consult your specific North Vape model’s manual for precise instructions, as button configurations can differ.
Adjusting Wattage/Power Settings
Many North Vape devices offer adjustable wattage or power settings, allowing you to customize your vaping experience. This control influences the vapor production and intensity of the flavor. Typically, wattage adjustment is managed through buttons located on the device’s body – often two small buttons positioned near the display screen.
To increase the wattage, press the ‘up’ button. Conversely, pressing the ‘down’ button will decrease the wattage. The current wattage level is usually displayed on the device’s screen. Start with a lower wattage setting, especially if you’re new to vaping, and gradually increase it until you find your preferred level.
Be mindful of your coil’s specifications; exceeding the recommended wattage can lead to a burnt taste or damage the coil. Experimenting with different wattage levels allows you to fine-tune your vape to achieve the ideal balance of flavor and vapor production. Always refer to your device’s manual for specific instructions and safety guidelines regarding wattage adjustment.
Vaping Techniques
Mastering vaping techniques enhances your North Vape experience. The most common method is the mouth-to-lung (MTL) technique, mimicking traditional cigarette inhalation – draw vapor into your mouth first, then inhale into your lungs. Direct-to-lung (DTL) involves inhaling vapor directly into the lungs, similar to shisha or hookah, producing larger clouds.
For MTL, take a slow, controlled draw from the mouthpiece, holding the vapor in your mouth briefly before inhaling. DTL requires a deeper, more sustained draw. Experiment to find what suits your preference. Puff length and intensity also impact vapor production and flavor.

Avoid excessively long puffs as this can overheat the coil and cause a burnt taste. Short, consistent puffs generally deliver optimal flavor. Proper hydration is crucial; vaping can be dehydrating, so drink water regularly. Remember to always prioritize a comfortable and enjoyable vaping style.

Maintenance and Care
Regular cleaning, pod, and coil replacements are vital. Maintaining your North Vape ensures optimal performance, longevity, and a consistently enjoyable vaping experience.
Cleaning Your North Vape
Maintaining a clean North Vape is crucial for optimal performance and hygiene. Regularly wiping down the exterior of your device with a soft, dry cloth will remove fingerprints and residue. Pay particular attention to the mouthpiece, as this comes into direct contact with your lips.

For a more thorough clean, gently dampen the cloth with a small amount of isopropyl alcohol. Avoid getting any liquid inside the device’s ports or openings. Carefully clean around the pod connection point to remove any e-liquid buildup.
The pod itself should be cleaned periodically. Remove the pod from the device and inspect it for any visible residue. If necessary, gently rinse the pod with warm water and allow it to dry completely before refilling. Never submerge the entire device in water or any other liquid.
Regular cleaning prevents the buildup of gunk and ensures a consistent, flavorful vaping experience. A clean device is a happy device!
Pod Replacement Instructions
Replacing the pod on your North Vape is a straightforward process, essential for maintaining flavor and preventing leaks. First, ensure your device is powered off for safety. Gently pull the empty pod straight down from the device – it’s designed for a secure yet easy removal.
Before inserting a new pod, inspect the connection point on both the device and the pod for any debris or e-liquid residue. Wipe clean with a dry cloth if needed. Take a fresh pod from its packaging, removing the protective cap or seal;
Align the new pod with the connection point and firmly push it upwards until you hear a click. This confirms a secure connection. Ensure the pod is fully seated to prevent leaking. After replacement, allow a few minutes for the coil to prime with e-liquid before vaping.
Regular pod replacement, based on usage, will guarantee a consistent and enjoyable vaping experience.
Coil Replacement Guide
Replacing the coil within your North Vape pod is crucial for optimal performance and flavor. Begin by detaching the empty pod from the device, ensuring it’s powered off for safety. Most North Vape pods feature a bottom coil replacement system.
Gently remove the bottom cap or plug of the pod. Carefully pull the old coil straight down and discard it responsibly. Before inserting a new coil, inspect the pod for any remaining cotton or debris. Take a new coil from its packaging, avoiding touching the cotton wicking.
Insert the new coil directly into the pod’s base, ensuring it’s firmly seated. Reattach the bottom cap or plug securely. Allow the pod to sit with e-liquid for 5-10 minutes to fully saturate the new coil – this is called priming.
Regular coil replacement, typically every 1-2 weeks depending on usage, will maintain consistent vapor production and prevent a burnt taste.
Troubleshooting Common Issues
Addressing issues like a device not firing, leaking pods, or a burnt taste is essential. Ensure proper charging and coil priming for optimal North Vape function.
Device Not Firing
If your North Vape device isn’t firing, several potential causes need investigation. First, verify the battery level; a depleted battery is the most common culprit. Connect the device to a power source using the appropriate cable and allow it to charge fully. It’s advisable to charge when the battery is low or the device prompts you.
Avoid using the device while charging, as this isn’t recommended. Next, ensure the device is powered on correctly. Refer to the ‘Powering On and Off’ section for specific instructions. Check the pod connection; a loose or improperly seated pod can prevent firing. Remove and reinsert the pod, ensuring it clicks securely into place.
Inspect the coil for damage or malfunction. A faulty coil may need replacement – see the ‘Coil Replacement Guide’. Finally, confirm that the wattage/power setting is appropriate for your coil and e-liquid. A setting that’s too low might not generate sufficient vapor. If problems persist, consult the full guide or contact customer support.
Leaking Pods
Pod leakage with your North Vape can be frustrating, but often easily addressed. First, ensure the pod is properly seated within the device. A loose connection is a primary cause of leaks. Remove the pod and firmly reinsert it until you hear a distinct click, confirming a secure fit.
Verify that the pod is not damaged. Inspect for cracks or visible breaks in the plastic housing. If damage is present, replace the pod immediately. Overfilling the pod with e-liquid is another common issue. Avoid exceeding the pod’s maximum fill line to prevent pressure buildup and leakage.
Proper vaping technique also plays a role. Avoid excessively forceful or rapid puffs, as this can create pressure and dislodge the pod seal. When transporting the device, keep it upright to minimize the risk of e-liquid migrating towards the airflow openings. Regularly clean the pod connection points to remove any residual e-liquid that might compromise the seal.
Burnt Taste
Experiencing a burnt taste with your North Vape usually indicates the coil is nearing the end of its lifespan or is not adequately saturated with e-liquid. The most common cause is a dry hit – vaping when the pod’s e-liquid reservoir is low or empty. Always ensure sufficient e-liquid is present before each puff.
If the pod is full, the coil may simply be burnt out. Replace the pod, as the coil is integrated and not individually replaceable in many North Vape models. Lowering the wattage/power setting can also help prevent burning, especially when using high-PG e-liquids. Start with a lower setting and gradually increase it until you find your sweet spot.
Proper priming is crucial. After filling a new pod, allow the e-liquid to saturate the coil for at least 10-15 minutes before vaping. This ensures the wick is fully wetted. Avoid chain vaping, giving the coil time to re-saturate between puffs. If the burnt taste persists after these steps, a new pod is likely required.

Safety Precautions
Always handle batteries responsibly and e-liquids with care. Avoid charging while in use and follow general safety guidelines for optimal device longevity and user well-being.
Battery Safety Guidelines
Prioritizing battery safety is crucial for a positive vaping experience. Never leave your North Vape device unattended while charging, and always use a compatible charger. Avoid exposing the device to extreme temperatures, such as direct sunlight or freezing conditions, as this can damage the battery and potentially create a hazard.
Inspect the battery regularly for any signs of damage, including swelling, leakage, or corrosion. If you notice any of these issues, discontinue use immediately and dispose of the battery properly according to local regulations. Do not attempt to disassemble or modify the battery pack in any way.
It is not recommended to use the North Vape while it is charging. This can lead to overheating and potential damage to both the device and the battery. Always store batteries in a safe and dry place, away from flammable materials and metal objects. Proper battery care extends the lifespan of your device and ensures a safe vaping experience.
E-Liquid Handling
Proper e-liquid handling is essential for both device performance and your well-being. Always store e-liquids in a cool, dark place, out of reach of children and pets. Ensure the bottles are tightly sealed to prevent leakage and oxidation, which can affect the flavor and quality of the e-liquid.
When filling your North Vape pod, avoid overfilling, as this can cause leakage and potentially damage the device. Use only high-quality e-liquids that are specifically designed for vaping. Be cautious when handling e-liquids, as nicotine is an addictive substance. Avoid contact with skin and eyes; if contact occurs, rinse thoroughly with water.
Dispose of empty e-liquid bottles responsibly, following local regulations. Never ingest e-liquid, and keep it away from food and beverages. Regularly check your pod for any signs of cracks or damage before filling. Maintaining careful e-liquid handling practices ensures a safe and enjoyable vaping experience.
General Safety Warnings
Prioritize safety when using your North Vape device. This device is intended for adult use only and should never be used by minors, pregnant women, or individuals with underlying health conditions. Keep the device away from extreme temperatures and direct sunlight, as this can damage the battery and other components.
Do not disassemble or modify the North Vape in any way, as this could pose a safety risk. Avoid dropping the device or subjecting it to physical shock. Regularly inspect the device for any signs of damage, and discontinue use if any issues are detected. Never leave a charging device unattended.
Always use a compatible charger and avoid overcharging the battery. Be mindful of your surroundings when vaping, and respect the vaping policies of any location you are in. Responsible vaping practices contribute to a safer and more enjoyable experience for everyone.